Icebox Rolls are perfect for any occasion; their buttery aroma and delicate texture are a great addition to cozy family dinners and larger, special gatherings. You will find yourself making these again and again.

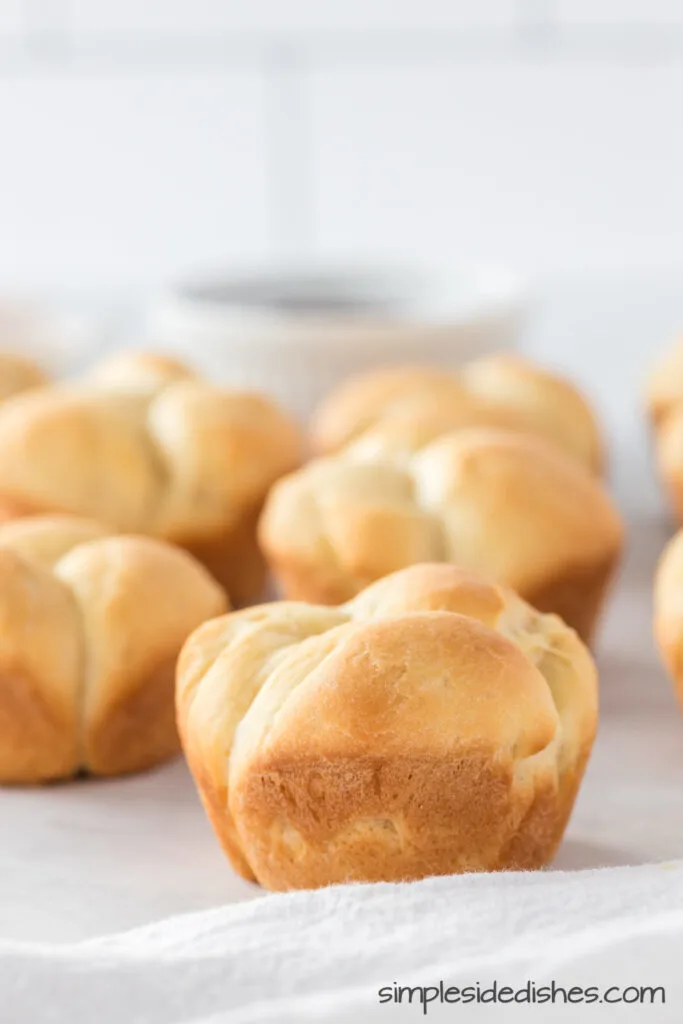
If you are a bread lover, you are going to love these icebox rolls! These rolls are light and fluffy, making them a perfect treat for bread lovers.
You know how great it is to have rolls with any of your favorite meals. Well this icebox rolls recipe is perfect served with a hearty soup, a savory main course, or as a standalone treat.
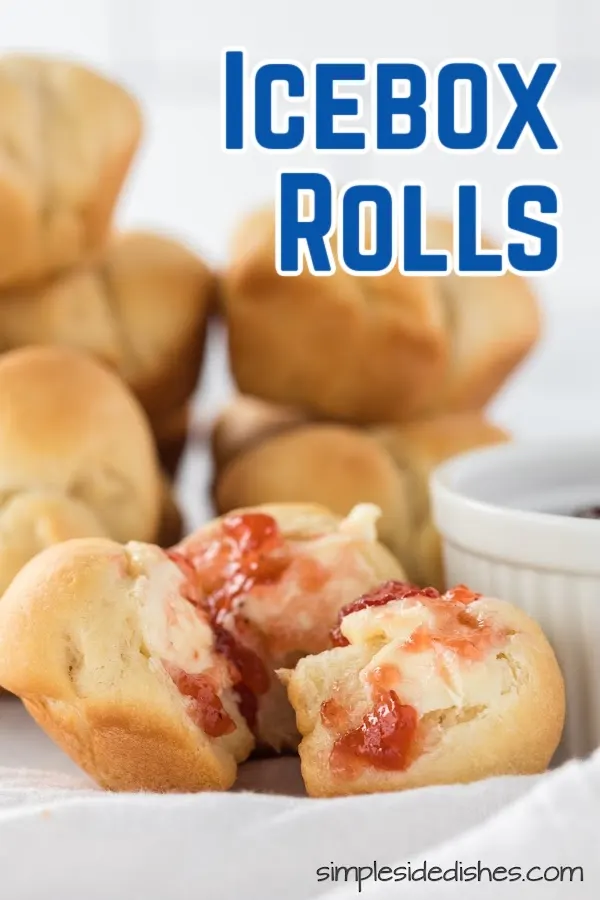
If you make icebox dinner rolls in a fun cloverleaf roll shape, they look fancy, without extra work. My kids are always impressed by them.
The best part about this recipe though is how easy it is to make it ahead of time. After making the dough, you can store it in the refrigerator for up to four days! That means you have ready made dough you can use on busy weeknights.
And if you make them and have leftovers, you can freeze cooked rolls to serve another day.


What Ingredients are in Icebox Rolls?
- Warm Water: this activates the yeast
- Yeast: this makes the ice box rolls light and fluffy
- Crisco: this gives you soft rolls that don’t dry out before or after baking
- White Sugar: you only need half a cup sugar to bring out the natural sweet dough flavors and activate the yeast
- Boiling Water: this melts the Crisco and makes it easier to shape your homemade dinner rolls
- Salt: this balances all the flavors and stops the yeast from growing too fast
- Eggs: these add a richer flavor to the rolls and helps to bind the dough together
- All-Purpose Flour: basic flour is all you need to get wonderful yeast rolls

How Do I Make Icebox Rolls?
- Combine yeast and lukewarm water in a small bowl or jar. Set aside.
- Cream together Crisco and sugar in a large mixing bowl.
- Add boiling water and mix until Crisco melts.
- Add yeast mixture, salt, and beaten eggs. Mix well.
- Slowly add single cups of the flour until the dough is no longer sticky.
- Place dough in a greased bowl, spray dough with cooking spray, cover bowl with plastic wrap, and refrigerate for up to four days.
- When ready to use, shape into dough balls, let rise, and bake until golden brown!
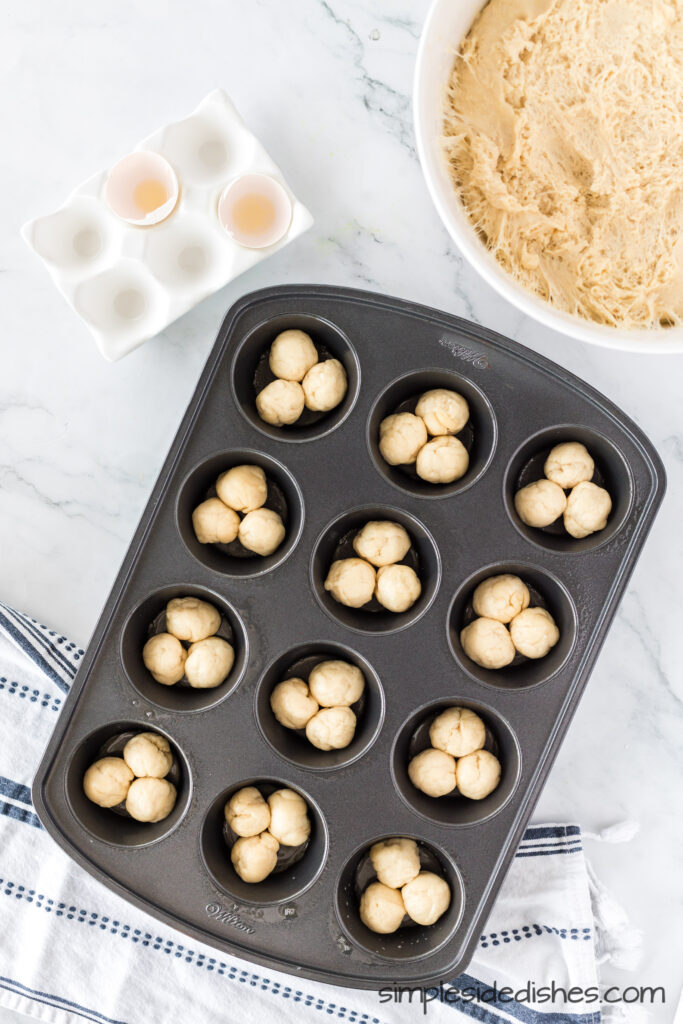
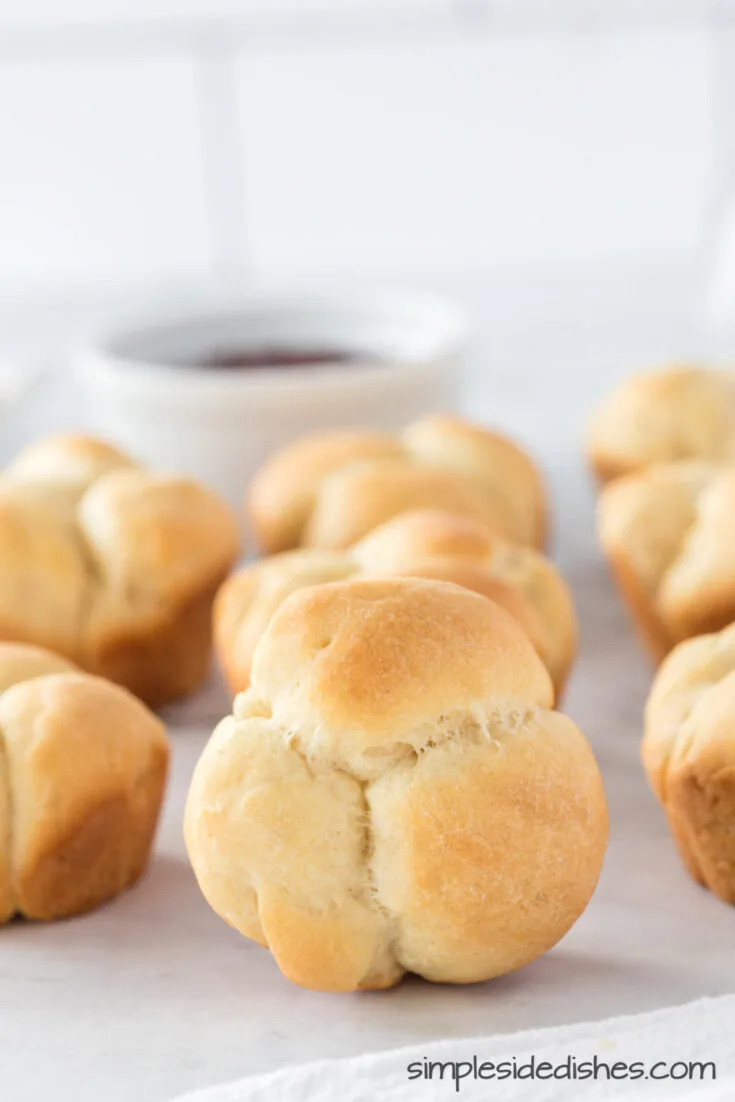
Pro Tips: I like to make cloverleaf rolls by using well greased muffin tins. Place 3 nickel sized pieces of dough in each muffin cup, then let it rise in a warm place until you are ready to cook.

Why are they called Icebox Rolls?
Icebox rolls got their name from the way they are made. You can keep the dough in the refrigerator before making them.
Before electricity and refrigerators, food that could go bad was literally kept in a box that was lined with ice to keep it cold. It was called an icebox.
Great recipes that have stood the test of time like this one keep their original names. So grandma’s icebox rolls keep the icebox name even though we don’t use boxes lined with ice in our kitchens today.

Can I Make Icebox Rolls Ahead of Time?
Yes, you can make the dough ahead of time and store it in the refrigerator for up to four days. By storing dough in the fridge, you have no knead icebox rolls which allows you to enjoy fresh, warm rolls anytime without spending time kneading the dough again and again.
For best results, we recommend eating these the same day they are baked.


How Do I Reheat Icebox Rolls?
To reheat Icebox Rolls, preheat the oven to 350°F (175°C). Place the rolls on a baking sheet and warm them for 5-10 minutes until heated through. Run a stick of butter over the tops to give them a really fresh taste!
You can also microwave the rolls for a few seconds until warm. But be careful! If you do it too long, your roll will change texture and become gluey or hard.


What Can I Serve with Icebox Rolls?
Icebox Rolls are the perfect side dish anytime you want rolls with your meal. Serve them next to soups, stews, roasted meats, with jam as part of your brunch spread, or whatever you are eating tonight. These rolls are a perfect match for any meal.
Pro Tip: For a fun dessert, slice one in half, add your favorite jam (we like raspberry) and a nice dollop of whipped cream. And just like that, icebox yeast rolls change into cream buns that everyone loves to eat!
Are Icebox Rolls Freezer-Friendly?
Yes, Icebox Rolls freeze well. Once cooled, place the rolls in an airtight container or freezer bag, and store them in the freezer for up to 3 months.
Thaw them at room temperature and eat them, or you can reheat them for a warm and delicious treat.


Are Icebox Rolls Healthy?
While Cloverleaf Rolls are delicious, they are more of a treat than a healthy food. With their buttery goodness and fluffy texture, these rolls are meant to be enjoyed in moderation as part of a balanced diet.
Are Icebox Rolls Vegan?
No, this refrigerator rolls recipe uses eggs in the dough to bind it and give it texture. That means this recipe is not vegan friendly even though it uses Crisco vegetable shortening instead of butter.


More Bread Recipes You’ll Love…
- Cornbread with Maple Syrup
- Homemade Flour Tortillas Crisco
- Banana Bread without Baking Soda
- Butternut Squash Bread
- Cinnamon Roll Bread
- Pumpkin Shaped Dinner Rolls
- Old Fashioned Biscuits
- Sweet Potato Yeast Rolls
- Biscuit Bread Loaf
- Braided Yeast Bread
- Basil Bread
- Bread Knots Recipe
- Whole Wheat Pumpkin Bread
- Cranberry Orange Bread
This make-ahead recipe ensures you have freshly baked rolls whenever you desire. Freezer-friendly and bursting with flavor, these icebox rolls will make any meal feel special.
Icebox Rolls

Indulge in the heavenly delight of soft and fluffy Icebox Rolls! Make-ahead convenience and incredible taste make this recipe a must-try.
Ingredients
Instructions
- In a bowl combine warm water (not hot) and yeast. Set aside.
- In a stand mixer, add Crisco, and white sugar and cream together.
- Add boiling water and mix well. Crisco should melt.
- Add yeast mixture and mix well.
- Add salt and eggs. Mix well.
- Slowly add in flour 1 cup at a time until all flour has been added to dough and it no longer sticks to the sides of the bowl.
- Transfer dough to a large greased bowl.
- Spray the top gently with cooking spray and then cover tightly with plastic wrap.
- Place in the fridge for up to 4 days.
- When ready to use, grease muffin tins.
- shape dough into slightly larger than nickel sized balls.
- Place 3 balls in each greased muffin tin. This is how to make cloverleaf rolls.
- Cover with a dish towel and let rise for 2 hours (great before going to church!)
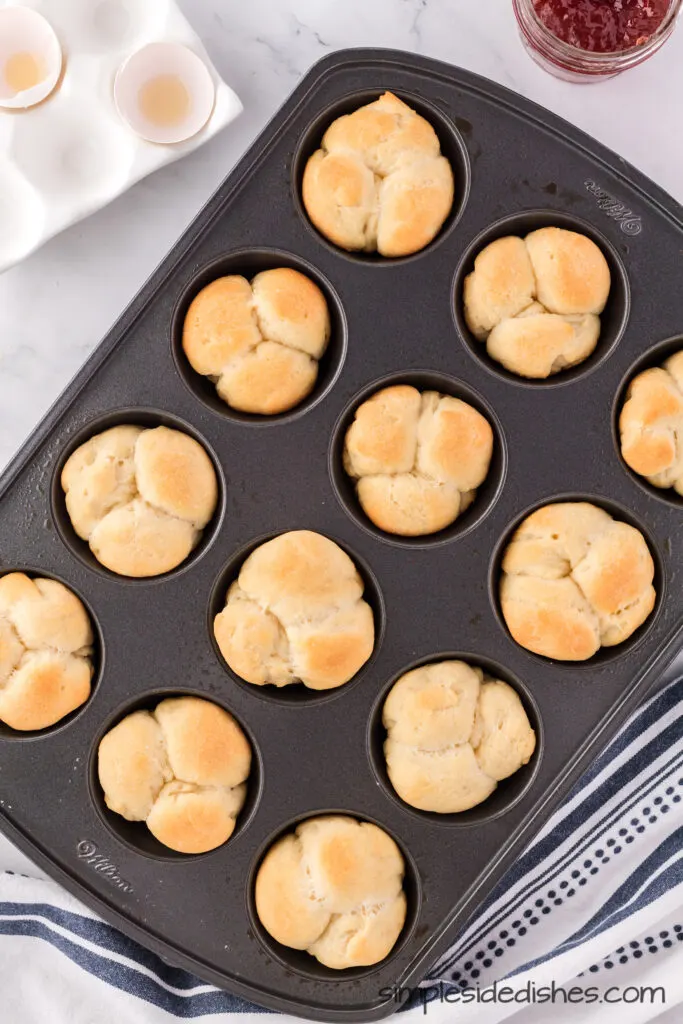
- When ready to bake, bake at 350*F for 20 minutes.
- Top with butter when hot from the oven.
Nutrition Information:
Yield:
48Serving Size:
1Amount Per Serving: Calories: 381Total Fat: 1gSaturated Fat: 0gTrans Fat: 0gUnsaturated Fat: 1gCholesterol: 8mgSodium: 50mgCarbohydrates: 80gFiber: 3gSugar: 2gProtein: 11g
Sherri Benavides
Saturday 17th of January 2026
Have you tried using your bread machine for these rolls and if you did, how did they turn out?
Janelle
Friday 30th of January 2026
Hi Sherri! That is a great question. I've not yet tried. If you do, let me know how they turn out!
Catalina
Wednesday 24th of July 2024
I tried the Icebox Rolls and they turned out amazing! They were so light and had a lovely flavor. My family devoured them, and I’ll definitely be making these again for our next meal.
Allyson Zea
Tuesday 23rd of July 2024
These were so easy to make, and so tasty! I'll definitely keep these in rotation from now on!
Sandra
Tuesday 23rd of July 2024
I was intrigued by the name of these rolls so I tried making them and the results were surprisingly good! We love them!
Erin | Dinners, Dishes and Dessert
Monday 22nd of July 2024
I'm obsessed with these, they smelled heavenly! It was perfect with butter and a warm bowl of soup! I have to bake another batch this weekend!